

Creating and Managing API Keys
Every Kintsugi API request carries two headers: an API key and an organization ID. This page covers creating a key in the app, the one moment you can copy it, and how to manage keys after that.
Four clicks in the Configuration page.
The key is shown once and never again.
Send your key and organization ID, and confirm they work.
Every endpoint your key can reach.
Before You Start
You need an account on the Kintsugi platform and access to an organization.
Keys can only be created in a Test or Paid organization. In any other organization type the option is disabled, so check which one you are signed in to before you start.
A key is scoped to one organization and grants the API access that organization has. You can hold several at once, which is what makes rotation possible without downtime.
Create an API Key
Open the API Keys Tab
Sign in to the Kintsugi platform. If you do not have an account yet, sign up first.
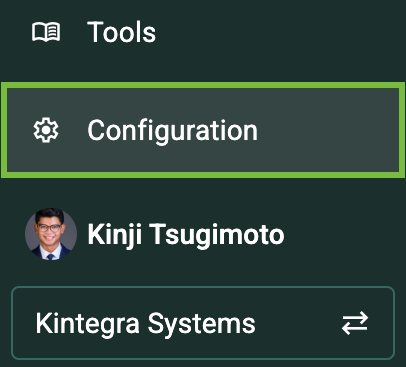
Select Configuration in the left sidebar, below Tools.
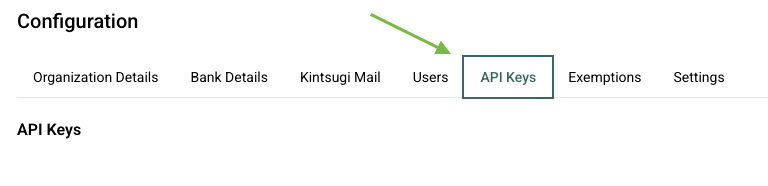
Configuration opens on a row of tabs. Select API Keys.
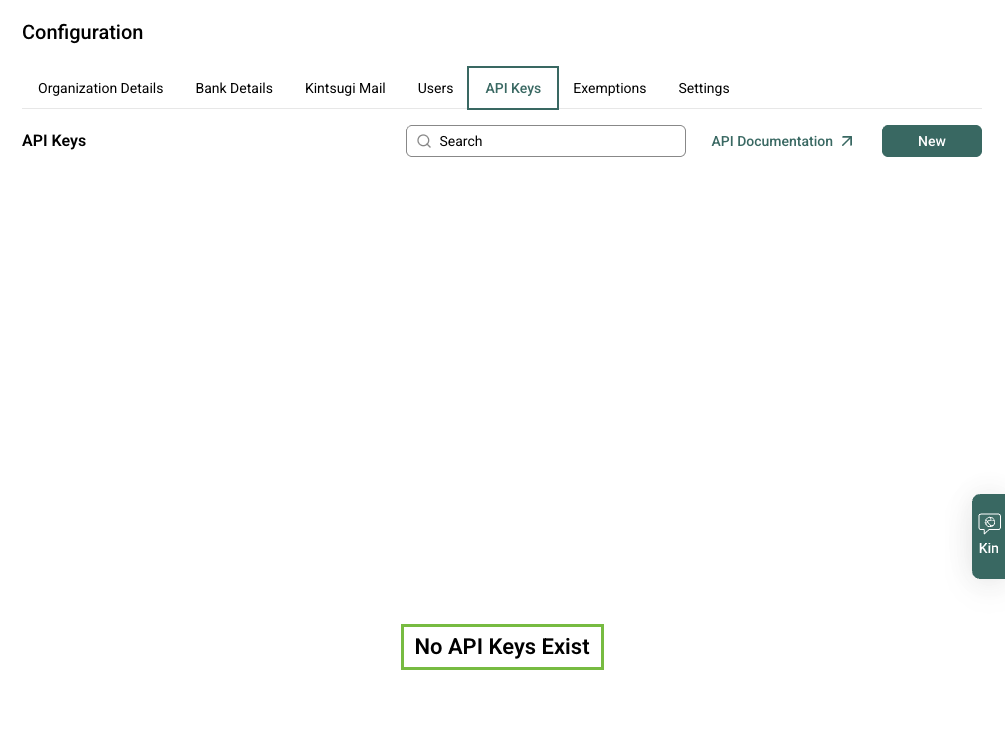
The tab lists every key belonging to the organization you are signed in to, with a search box, a link back to this documentation, and a New button. A new organization has none yet.
Create a New API Key
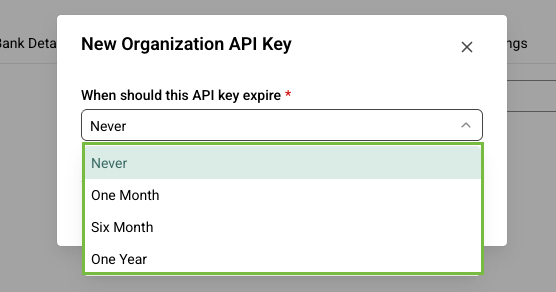
Click New. The New Organization API Key dialog opens, named for the scope the key will have.
Choose when the key should expire: Never, One Month, Six Month, or One Year.
Pick the shortest window that covers the work. An expiring key limits how long a leaked one is useful, and the expiry date is the reminder to rotate. One Month suits local development and spikes, One Year suits a production integration you will rotate on schedule, and Never is worth choosing only when something other than the calendar will retire the key.
Confirm to generate the key.
Copy and Secure Your API Key
This is the only time the key is visible. Copy it before you close the dialog. There is no way to reveal it again, so a key you did not copy has to be deleted and replaced.
Click the copy icon, or Manually copy API key to select the full value yourself.
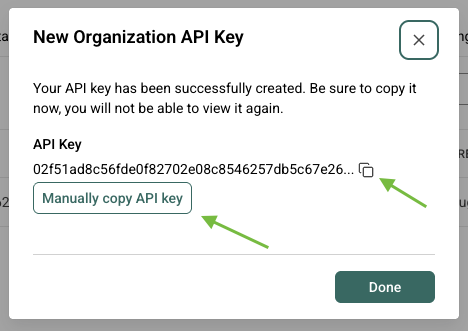
Paste it straight into wherever your application reads secrets from, before you do anything else.
Click Done.
Three habits worth keeping from the start:
- Read the key from the environment, never from source. A key in a commit is a key in your history, and rewriting history is a worse afternoon than rotating a key.
- Use a separate key per application and environment. Keys are independent, so one can be revoked without taking the others down with it.
- Share through a password manager, not chat or email.
Viewing and Managing Your API Keys
The API Keys tab lists each key with its truncated value under KEY, plus its CREATED and EXPIRES dates. Only the truncated form is ever shown again. Use the search box to find a key, and the three-dot menu (⋮) at the end of its row to delete it.
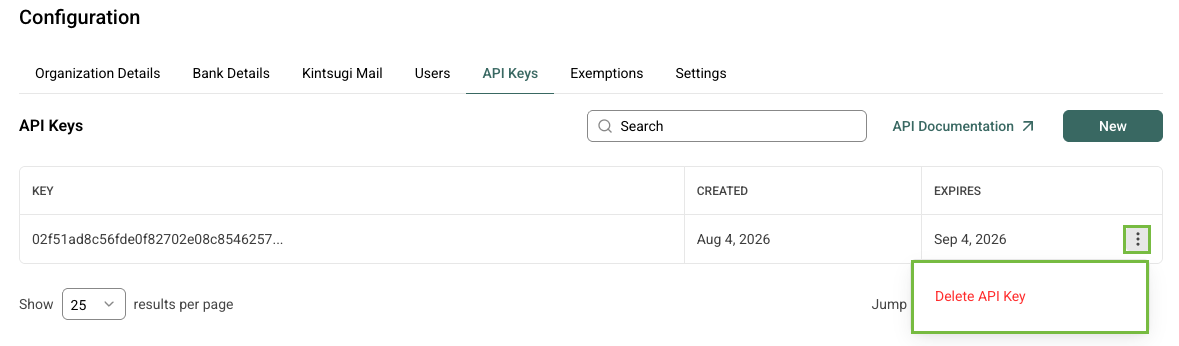
Deleting a key takes effect immediately and cannot be undone. Anything still using it starts getting 401 Unauthorized on the next call, so put the replacement in place first. See Error Handling for what an authentication failure looks like.
Rotating a Key
Because an organization can hold several keys at once, rotation needs no downtime and no maintenance window:
Generate a new key alongside the one you are retiring.
Update the secret your application reads and roll it out.
Make a request and check it succeeds. Making an Authenticated Request is the quickest check.
Only once nothing is using it. Deleting first is what turns a rotation into an outage.
Set expiry when you create the key and rotation stops being something you have to remember. The EXPIRES column is your schedule.
Next Steps
Send x-api-key and x-organization-id, and find your organization ID.
Choose L1 or L2 before you write code.
Python, TypeScript, Java, PHP, and Ruby clients that handle the headers.
Run each workflow interactively before you build it.
Status codes, retries, and what a rejected key returns.
Give your AI coding assistant the live API and docs.