
Creating and Managing API Keys

API keys authenticate your requests to the Kintsugi API. This guide will walk you through creating, managing, and securing your API keys with screenshots and step-by-step instructions.
API keys are essential for accessing the Kintsugi API programmatically. They provide secure authentication for your applications and integrations.

Create Your First Key

Generate an API key in just a few clicks

Security Best Practices

Keep your keys secure and compliant

API Reference

Explore our comprehensive API docs

Test Your Key

Verify your API key works correctly
Where you create and manage API keys depends on your account type. Use the section that matches you:

Partner Experience

Partners manage keys inside the Partner Experience

Kintsugi app (direct customers)

Direct customers manage keys in the main Kintsugi app

Partner Experience (Partners)

If you access Kintsugi through the Partner Experience (PX), your API keys are created and managed inside the Partner Experience itself — you no longer go into the main Kintsugi app (app.trykintsugi.com) to mint an organization-specific key.
Partner accounts are provisioned automatically. Partner organizations are managed in PropelAuth as their own organizations, separate from standard (client) organizations. Your partner org is created for you — there’s no need to manually create a standalone organization. When a user is added to the Partner Experience, an invite email is sent automatically.

Key scopes

Client API keys are issued with one of two scopes, set at creation:
ScopeCreated withGrants access to
Partnerno clientOrganizationIdThe Partner APIs (/v2/partner/*), portfolio-wide across all client organizations linked to the partner.
Clienta clientOrganizationId (must be in the partner’s portfolio)The main organization APIs, scoped to that single client organization. Sent with x-organization-id set to that client.
All keys are validated by the x-api-key header; scope is enforced from the key’s metadata. Creating, listing, and deleting keys requires the partner owner or admin role.

Manage keys in the Partner Experience

1
Log in to the Partner Experience.
2
Open the Settings section and select API Keys .
3
Create a key. Leave the client organization unset for a portfolio-wide partner key, or select a client organization for a client-scoped key. Optionally set an expiration.
4
Copy the key immediately and store it securely — the token is shown only once.

Manage keys via the API

The same operations are available programmatically on the Partner API (owner/admin only):
# Partner-scope key (portfolio-wide on the Partner APIs)
curl -X POST https://api.trykintsugi.com/v2/partner/api_keys \
     -H "x-api-key: your-partner-api-key" \
     -H "Content-Type: application/json" \
     -d '{}'

# Client-scope key (one client organization, used on the main org APIs)
curl -X POST https://api.trykintsugi.com/v2/partner/api_keys \
     -H "x-api-key: your-partner-api-key" \
     -H "Content-Type: application/json" \
     -d '{"clientOrganizationId": "org_123", "expiresAtSeconds": 1767225600}'
The response returns apiKeyId and apiKeyToken. The token is returned once and is not retrievable afterward.
POST /v1/organizations/api_keys also remains available for creating org-scoped keys during programmatic client onboarding. See the Partner Organization Setup guide.

Kintsugi app (direct customers)

If you’re a direct/customer account, create and manage your API keys in the main Kintsugi app.

Sign Up or Log In

1
2
If you don’t already have an account, click on the Sign Up button and follow the instructions to create an account.
3
If you already have an account, click on the Log In button and enter your credentials to access the platform.
1
After logging in, locate the Configuration option in the bottom-left corner of the sidebar.
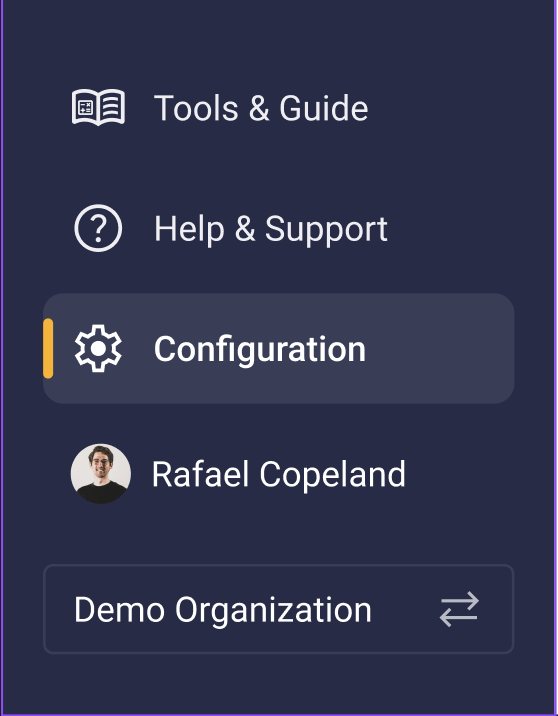
Configuration Section
2
Under the Configuration Section locate API Keys as shown in the screenshot below.
API Keys Section

Access the API Keys Section

1
Once in Configuration Section click API Keys section.
2
Here, you can search, manage, and generate new API keys for your organization.
API Keys Section

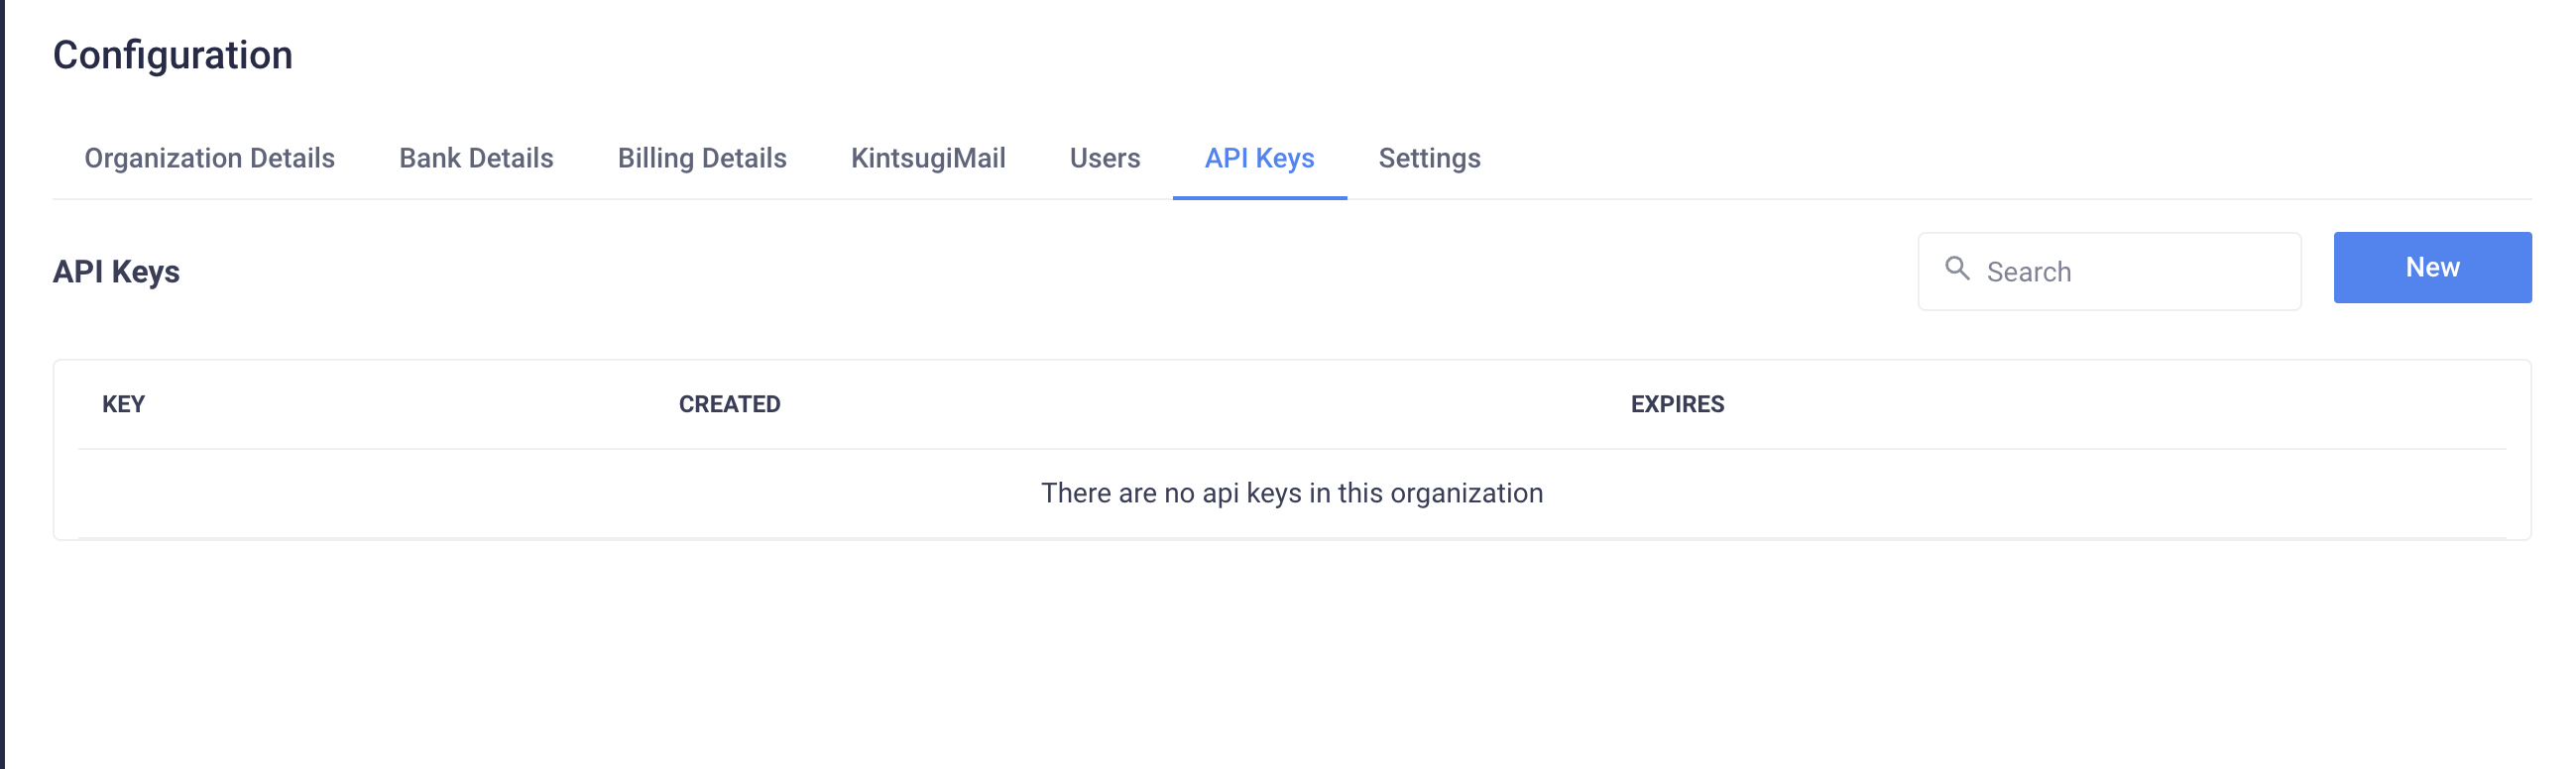
Create a New API Key

1
Click the New button to generate an API key.
2
Once you click on New, you’ll be prompted to select the expiration time for the API key.
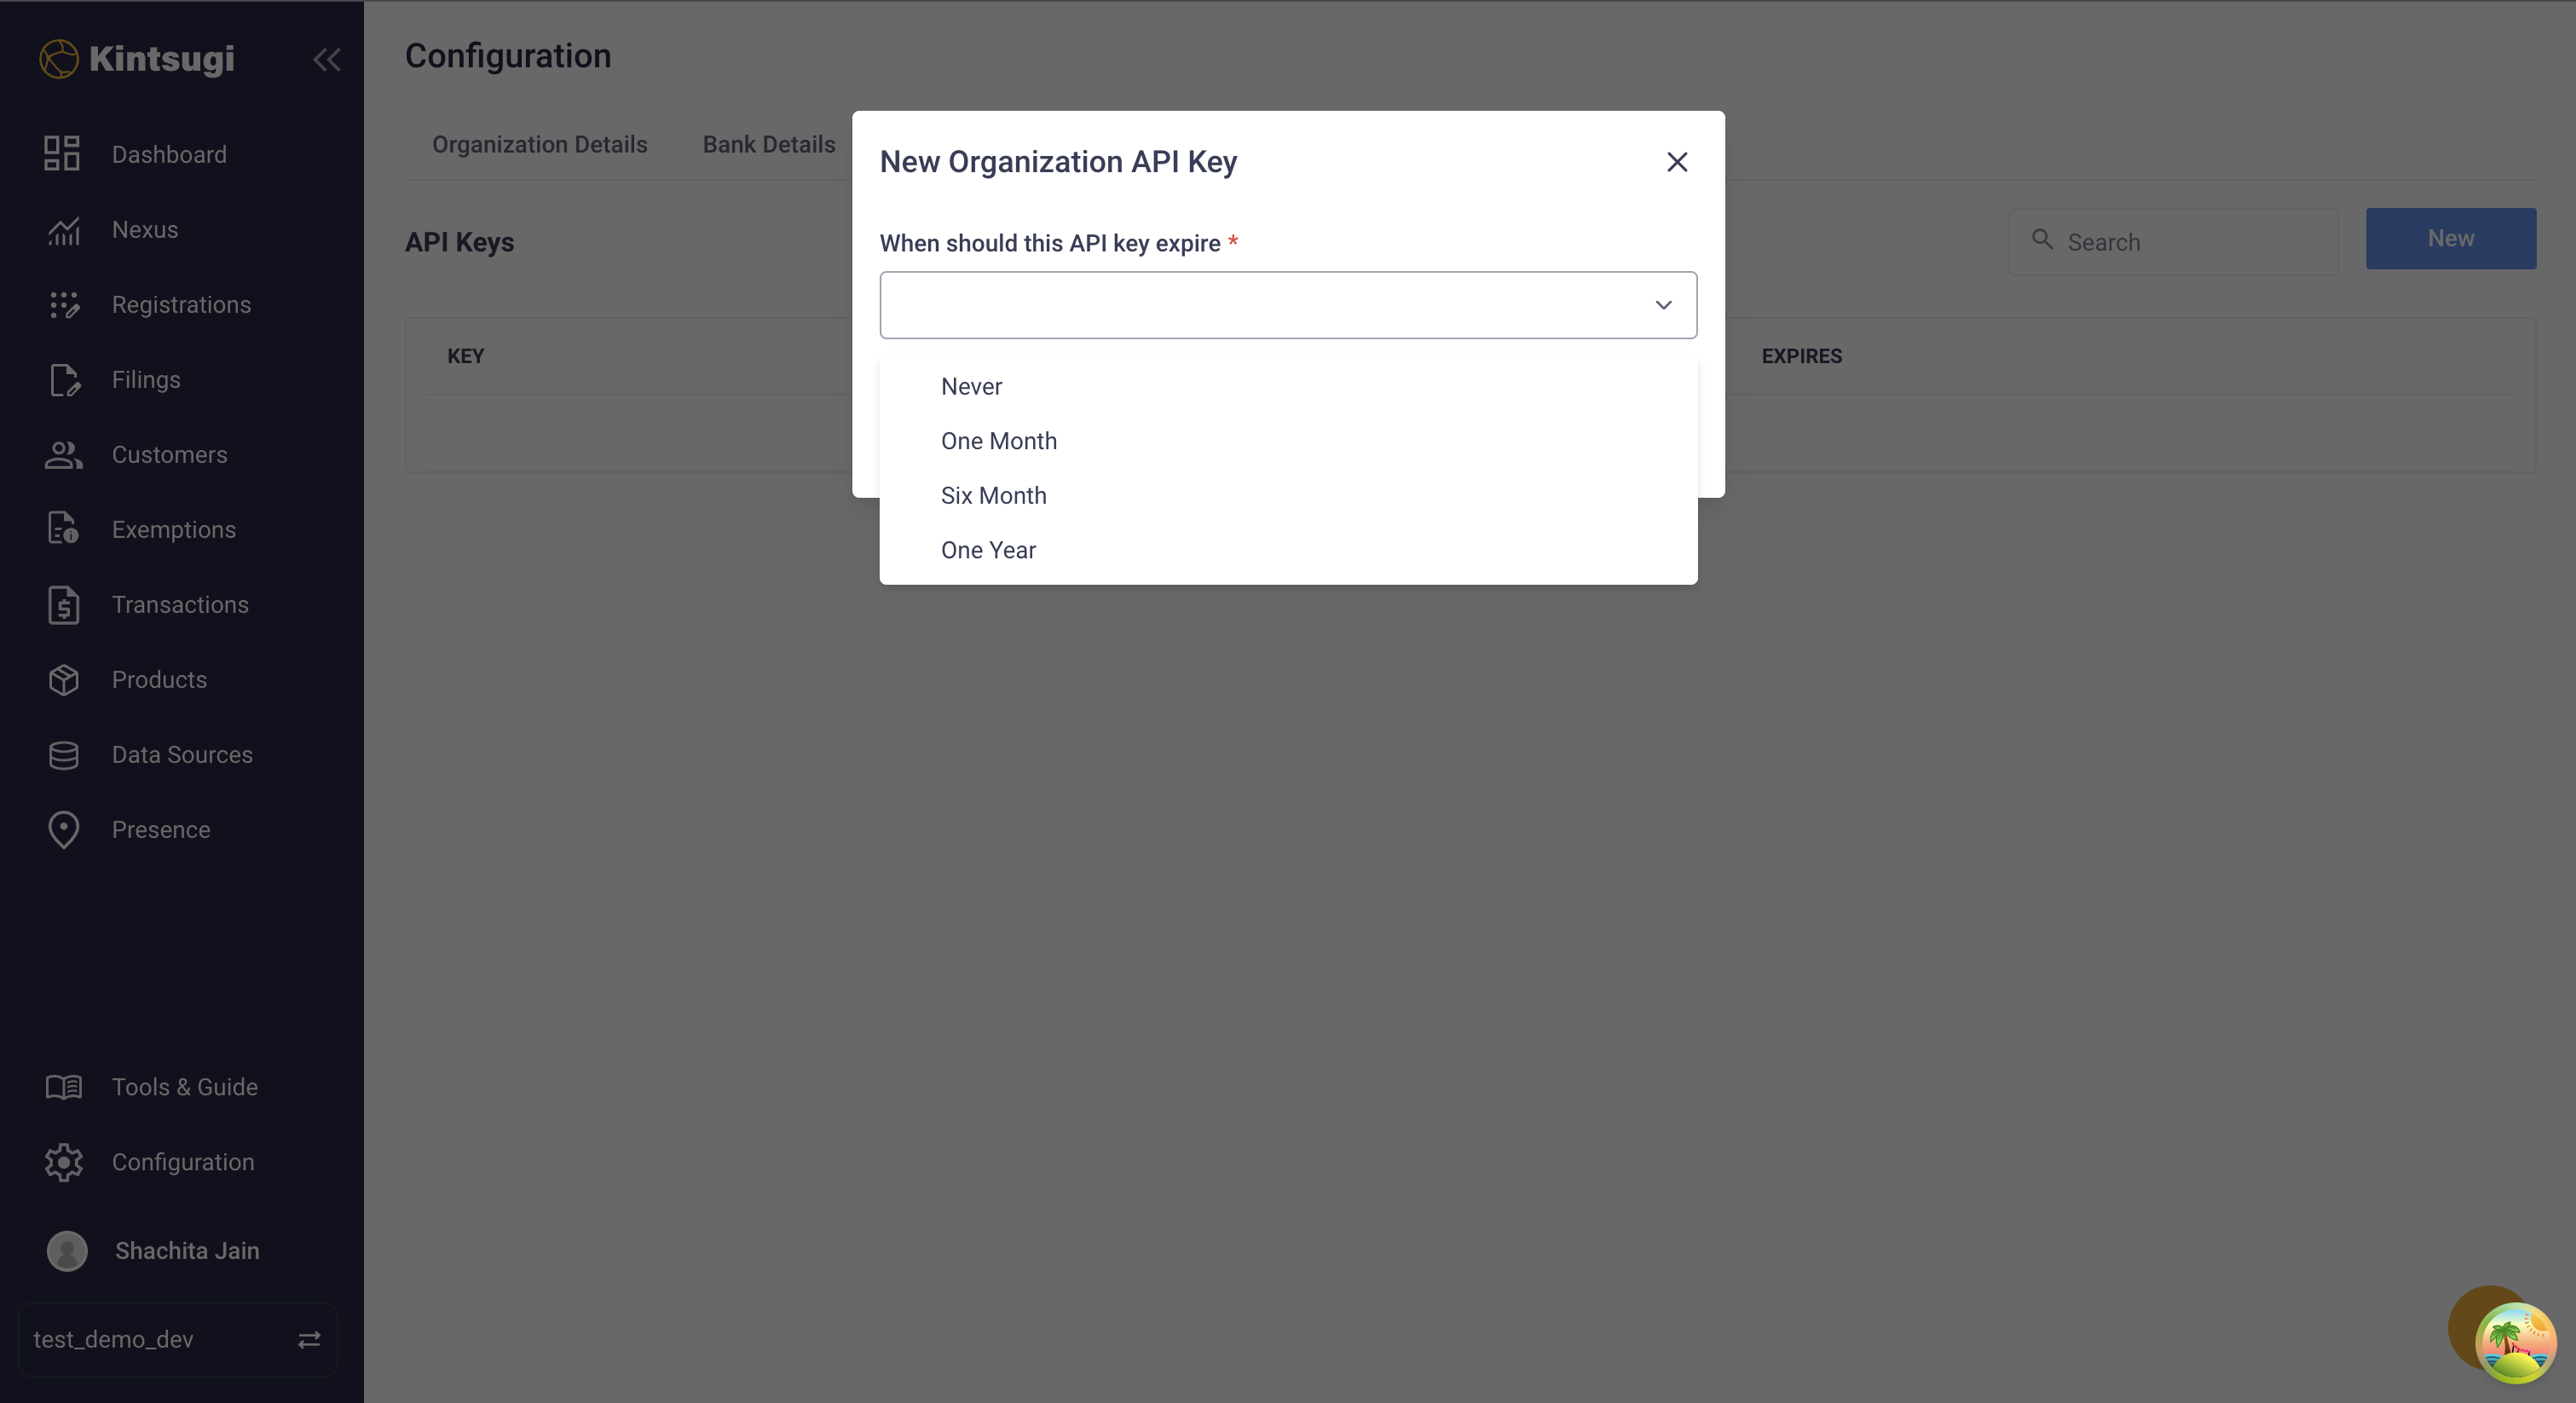
API Key Expiration
3
Choose the expiration period that suits your needs. For example, if you want the key to be valid for a year, select One year.

Copy and Secure Your API Key

  1. Copy the API Key Immediately.
1
Click the copy icon or Manually copy API key button to copy the key.
2
You will not be able to view this key again, so ensure you store it in a secure location.
3
After copying, click Done to exit the popup.
API Key Copied

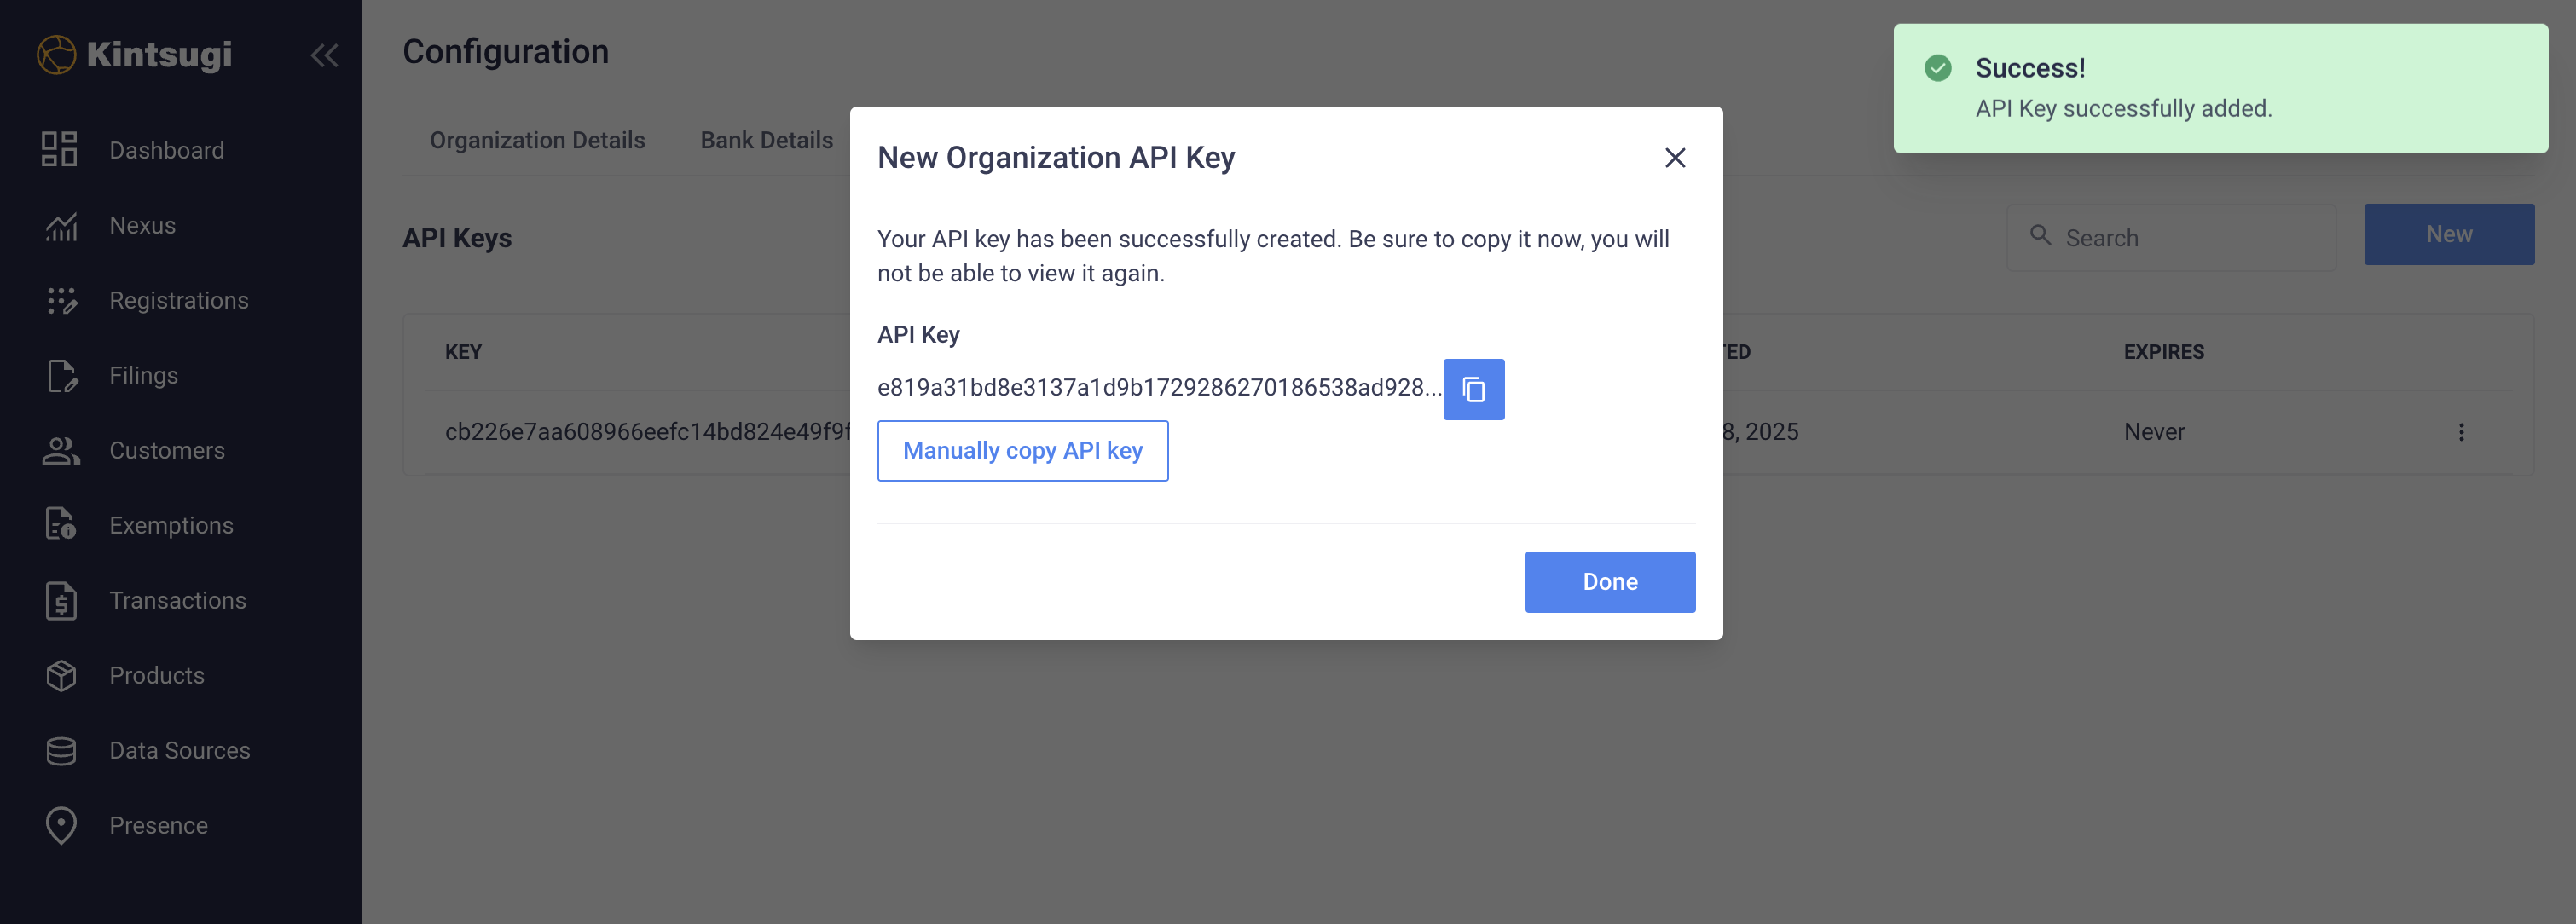
Viewing and Managing Your API Keys

1
You can view all generated API keys along with their Key, Created Date, and Expiry Status.
2
Use the search bar to quickly find a specific key.
3
To delete a key, click the three-dot menu (⋮) next to it and select Delete API Key.
API Key Management
API Keys are scoped to an organization and will remain active until the organization is deleted or the key is deleted. You can create multiple API keys to cycle them out periodically.
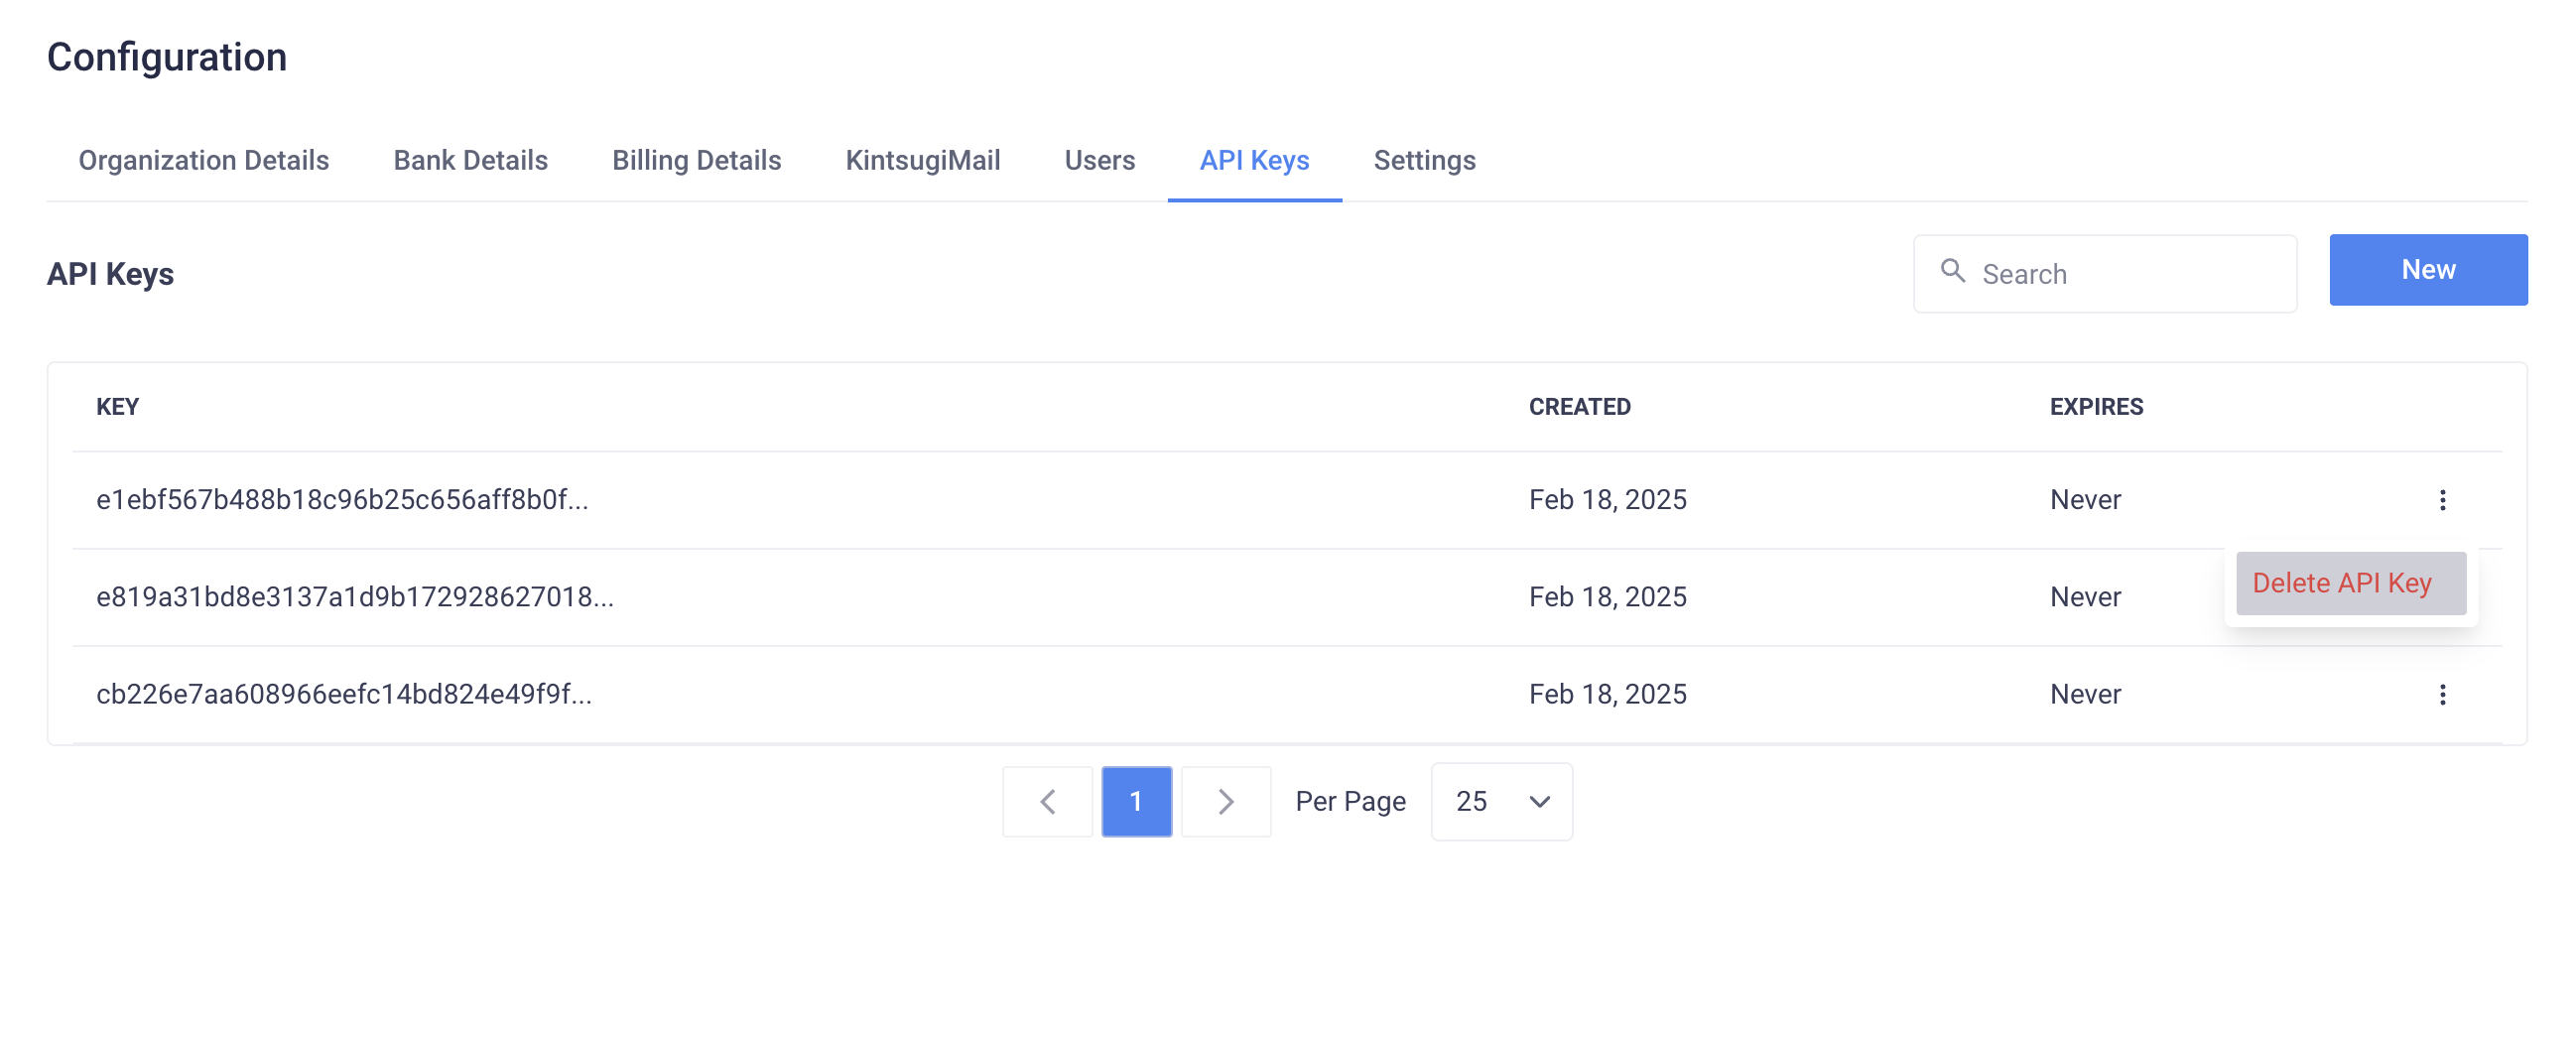
Users can only create API keys within a Test Organization or a Paid Organization. Creating API keys in other organization types is disabled.

Next Steps

Test Your Key

Verify your API key works correctly

API Reference

Explore available endpoints

Integration Guides

Connect your applications

Need Help?

  • Can’t find API Keys section: Check you’re in a Test or Paid organization
  • Permission denied: Contact your organization admin
  • Key not generating: Try refreshing the page and try again
  • Expiration options: Choose based on your security requirements

Email Support

Get help from our support team

Live Chat

Chat with us in real-time

API Documentation

Browse our comprehensive API docs

Developer Community

Connect with other developers